System settings
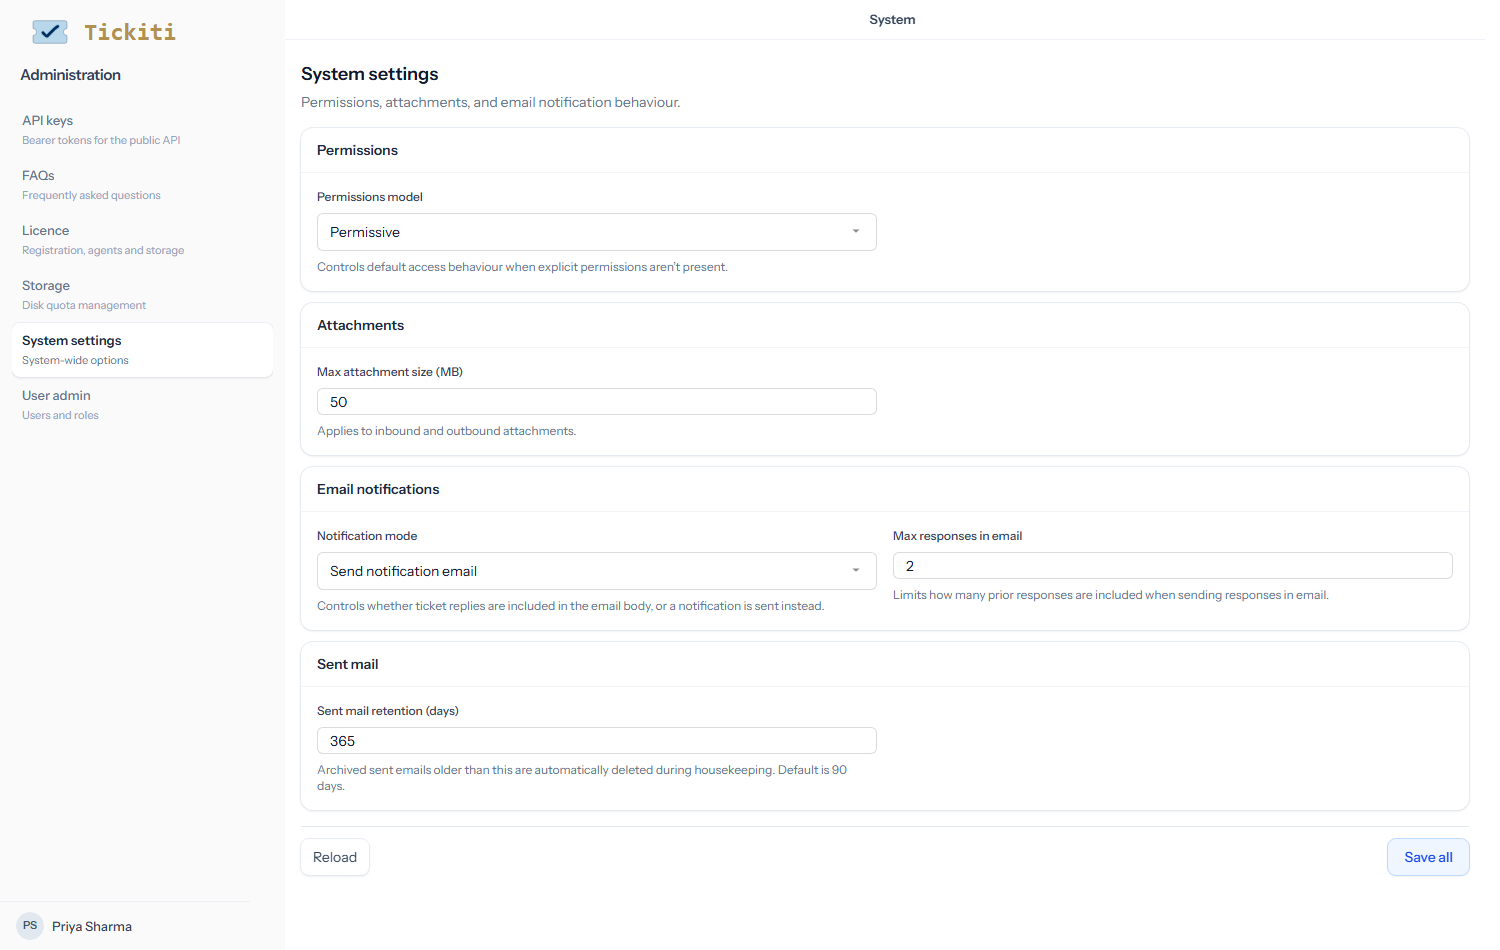
The system-wide defaults live at Administration → System settings in the admin user-menu dropdown. They cover how access defaults when permissions are not set, the per-file attachment size limit, the format of customer notification emails, how long sent-mail archives are kept, and reply signatures. The page is admin-only.
Permissions
Permissions model — Permissive or Restrictive. This controls how Tickiti behaves when a new queue is created:
- Permissive (the default) — a newly created queue is automatically granted Contribute + Manage + Delete to every staff user. Good for small teams who treat all queues as open by default.
- Restrictive — a newly created queue starts with no permissions; the admin has to grant access deliberately. Good for larger teams where queues correspond to separate functions.
Switching this setting only affects future queue creation; it does not retroactively change permissions on existing queues. See Queue permissions for the full per-queue picture.
Attachments
Max attachment size (MB) — the per-file size limit for inbound and outbound attachments. Default 50 MB. Files larger than this are rejected at the dropzone with an error; inbound attachments over the limit are skipped. The list of allowed and blocked file types is configured separately — see Attachment rules for that.
Email notifications
- Notification mode — two options: Send responses in email includes the recent ticket replies in the notification email body, so the customer sees the conversation without leaving their inbox; Send notification email sends a short note with a link only, nudging the customer to read the conversation on the ticket page. Most teams use the latter; pick the former if your customer base struggles with the click-through.
- Max responses in email — when Send responses in email is selected, this limits how many of the most recent responses are inlined. Default 2. Higher values make the email longer but less click-through to the ticket page; lower values keep emails concise but require the customer to read context on Tickiti.
Sent mail
Sent mail retention (days) — the housekeeping task deletes archived sent emails older than this. Default 90 days. Increase if you need a longer audit trail; decrease if storage is tight. See the Sent mail page (in the Mail menu) for the audit itself.
Signatures
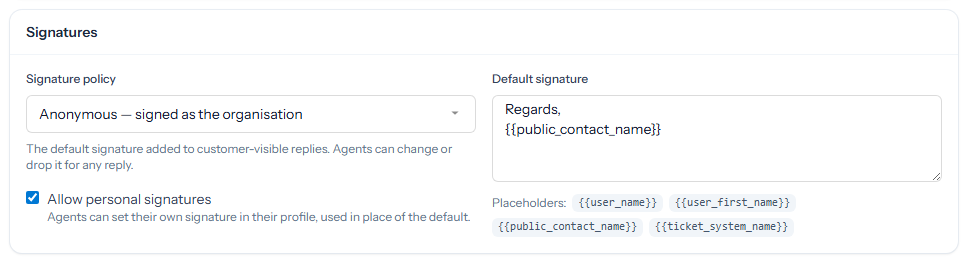
- Signature policy — None (no default signature), Anonymous (signed as the organisation) or Public (signed with the agent’s name). Choosing a policy fills in a starting default signature, which you can then edit.
- Default signature — the text added to customer-visible replies. Placeholders are filled in when a reply is sent:
{{user_name}}and{{user_first_name}}for the agent,{{public_contact_name}}and{{ticket_system_name}}from your branding. - Allow personal signatures — lets staff set their own signature in their profile, used in place of the default.
Agents can still change or drop the signature for any single reply — see Responding to tickets. Staff notes and tasks are never signed.
Saving
All the cards are committed together with the Save all button at the bottom right of the page. The save indicator next to the page title flips to Saving…, then Saved, so you have visual confirmation. Reload discards any unsaved edits and refetches from the server — useful if a colleague has been making concurrent changes.
Other admin pages
Other administrative areas have their own dedicated pages:
- User admin — User management and per-queue permissions.
- Queues — Queue configuration in the Workflow section of the Settings menu.
- Mailboxes — Mailbox setup in the Mail menu.
- Attachment rules — Attachment rules in the Mail menu.
- Escalations — Escalations in the Workflow section.
- Storage, Licence, API keys, Sent mail — each has its own page in Administration or Mail.