Queue configuration
Queues are broad, top-level categorisations of tickets — Sales, Support, Tasks and so on. Each queue has its own permissions and its own outgoing mailbox, so notifications and emails about a ticket are sent from the address tied to its queue: a ticket in the Sales queue would go out from [email protected], a ticket in Support from [email protected]. Use queues for the small set of buckets the whole organisation recognises; for finer-grained categorisation within a queue, use perspectives for dynamic groupings and watchlists for hand-picked sets.
The queue admin page is at Settings → Queues (in the Workflow section of the Settings menu) and is admin-only.
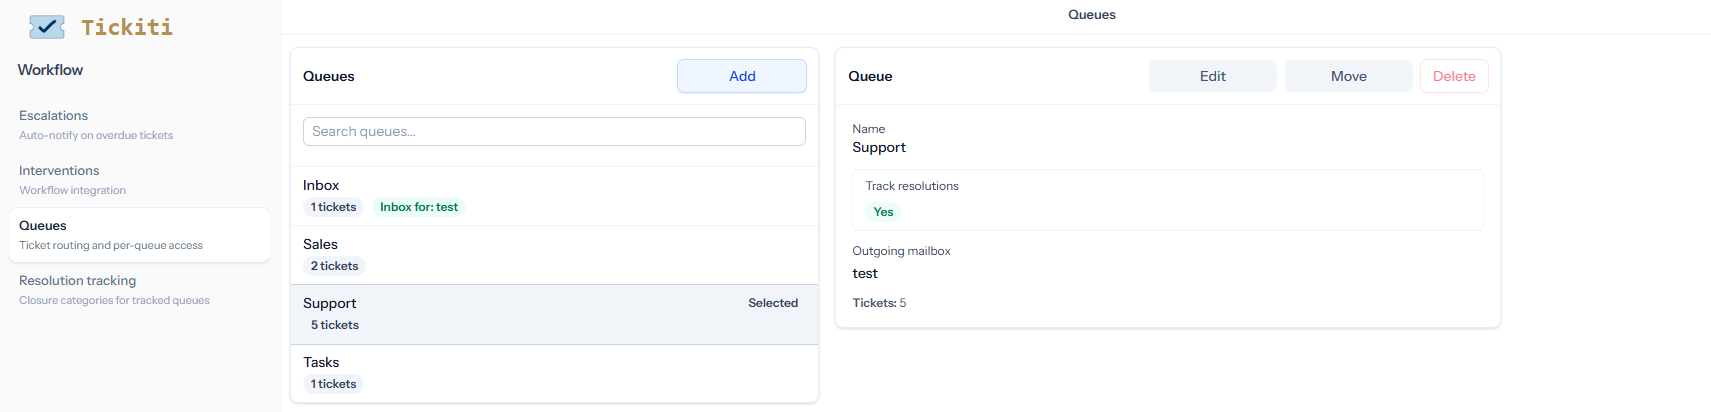
The queue list
Each row shows the queue name plus a few chips:
- Ticket count — how many tickets currently sit in this queue.
- Inbox for: <mailbox> — appears when a mailbox has been configured to route incoming tickets directly into this queue, naming that mailbox (or mailboxes). Most queues will not show this chip; the routing is opt-in per mailbox and is set up in Mailbox setup, not here.
The internal Drafts queue is hidden from this list — it holds in-progress unsent tickets per user and is managed automatically by Tickiti, not by an admin.
Editing a queue
Click a queue to view its current settings, then click Edit to change them. The fields are:
- Name — how the queue appears in the UI everywhere else.
- Holds — Tickets (the default) or Tasks. See Task queues below.
- Track resolutions — when on, closing a ticket in this queue prompts the closer to pick a resolution category (Resolved / Unresolved / No response / Advice given / Other reason). Powers the Resolutions report. Only worth turning on for queues where you actually measure outcomes; needs the has_resolution_tracking plan capability.
- Outgoing mailbox — the mailbox used as the From address when Tickiti sends emails about tickets in this queue. Needs to be set; see Mailbox setup.
The detail pane also shows read-only counts (total tickets, inbox-for mailboxes, whether perspectives reference it).
Task queues
A queue set to hold Tasks turns everything in it into a task — internal work for the team rather than a conversation with a customer. Tasks gain start and due dates, take staff-only replies, and can have reminders.
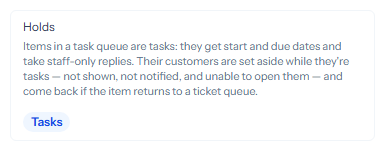
While an item is in a task queue, any customers on it sit out: they are not shown, are never notified, and cannot open it. They are not removed, though — move the item back into a ticket queue and they reappear, just as they were. If one of them writes in meanwhile, their email opens a new ticket for someone to review rather than landing on the task.
Changing what an existing queue holds changes every item in it at once, so it is usually better to create a separate task queue and move work into it.
Move and Delete
- Move — relocates all the tickets currently in this queue into another queue. Useful when you are about to retire a queue, or restructuring teams. The dialog tells you exactly how many open and closed tickets will move.
- Delete — removes a queue. Only allowed when the queue holds no tickets and no perspectives or other configuration references it; the button stays disabled with an explanatory tooltip until those constraints are met. The built-in Inbox queue cannot be deleted.
Adding a queue
- Click Add at the top of the queue list.
- Set the name.
- Pick the default outgoing mailbox.
- Choose whether it holds Tickets or Tasks.
- Optionally tick Track resolutions.
- Click Save.
- Use User admin to grant queue access to staff who need it — new queues start with no permissions until you set them. See Queue permissions for what each permission level allows.
The number of custom queues you can have is capped by your plan; built-in queues do not count against the cap. If the cap is reached the Add button shows the cap and the path to extend it.
Inbox
The built-in Inbox queue is the default landing place for new customer tickets unless an explicit mailbox routes them somewhere else. It cannot be deleted. You can rename it (most teams keep the name) and you can change its outgoing mailbox; from there it behaves like any other queue.
If you want a different routing — for example tickets from your sales@ mailbox going straight into a Sales queue rather than landing in Inbox first — configure the routing on the mailbox itself; see Mailbox setup.
Parked queues
Some queues exist only to collect tickets that are handled automatically — for example a Discounts queue whose requests are processed by a rule or integration and never opened by a person. Marking a queue as parked tells Tickiti that nobody is watching it, so a ticket sitting there must be surfaced the moment a customer gets involved.
Each parked queue names a release queue. When a customer replies to a ticket in a parked queue, Tickiti reopens the ticket if it was closed or on hold and moves it into the release queue. If the release queue is an inbox, its inbox managers are added to the ticket as temporary participants (anyone already on the ticket is skipped) so the reply lands in front of a person; if the release queue is not an inbox, the ticket’s participants are left unchanged and it simply becomes visible there. Staff replies and automated processing never trigger a release — only a genuine customer response does.
Turn this on in the queue editor: tick Parked queue and choose the release queue. Drafts and other parked queues cannot be chosen as a release target. If a queue you picked as a release target is later deleted, the parked queue simply stops releasing until you choose a new one.
Picking the queue set
A small number of well-named queues is easier to manage than many fine-grained ones. Start with a queue per responsibility, not per topic — e.g. Support + Sales + Tasks, rather than one queue per product line. Use perspectives and hashtags to slice by topic within a queue.